Breath control for keyboards without USB MIDI host support
Connect MRTAUDIO Standard to a workstation by DIN MIDI and USB power, with Korg Pa3X examples, CC7/CC11 switching and LED confirmations.
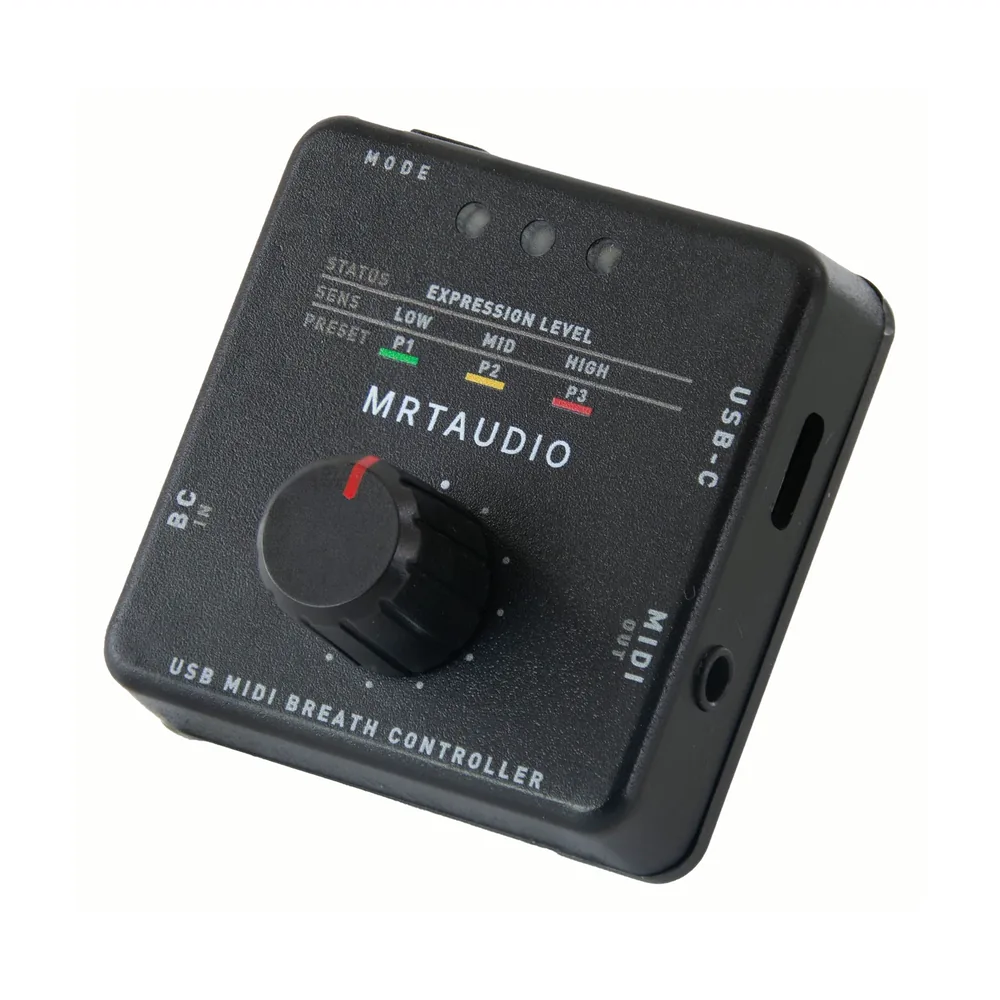
Send MIDI through DIN; choose power separately
A USB socket is not proof of USB MIDI host support. Some workstation and arranger keyboards accept only supported storage or accessories at their USB HOST ports; USB DEVICE usually connects the keyboard to a computer. For any keyboard with MIDI IN but no compatible USB MIDI host, use DIN for MIDI and a separate regulated 5 V USB supply for power. Check the exact model's manual. The options below apply to these instruments generally; Pa3X is one example.
For Korg Pa3X, connect MRTAUDIO MIDI OUT to the keyboard's MIDI IN using a 3.5 mm TRS MIDI Type A to 5-pin DIN cable. Korg documents USB MIDI on the Pa3X USB DEVICE port for a computer connection. That does not establish compatibility between its USB HOST ports and this controller. If the keyboard repeatedly reports an unrecognized USB device, disconnect that USB connection.
The recommended setup is a separate regulated 5 V USB power supply for MRTAUDIO, with no USB cable connected to the keyboard. USB data can remain enabled on MRTAUDIO. MIDI travels through DIN, and the controller can later be connected to a computer for configuration or firmware updates without changing its USB setting.
- MRTAUDIO MIDI OUT to the keyboard's MIDI IN; not to MIDI OUT.
- Use Auto Safe or DIN Safe Only, not USB Only. These routing modes do not disable USB device enumeration.
- Match the receiving MIDI channels and accepted CC message in the keyboard's MIDI settings.
Two alternatives when taking power from the keyboard
If the keyboard provides a suitable USB power output, use a USB cable explicitly specified as power-only, with no USB data lines. A cable that charges a device may also carry data, so a 'charging cable' label alone is not sufficient. With this option, the keyboard supplies power and DIN carries MIDI. Use a known data cable again for computer configuration or updates.
Alternatively, disable USB data on MRTAUDIO before connecting it to the keyboard's suitable USB power output. Disconnect the keyboard first and perform the MODE startup procedure below using a separate power supply. USB data OFF is saved across power cycles; USB power and DIN remain available. If a keyboard warning persists, use the separate power supply instead.
Confirm USB data ON or OFF after releasing MODE
With power disconnected, hold only the side/rear MODE button while connecting USB power. Keep holding while Amber is steady. When Amber goes out after about 2 seconds, release MODE. The saved USB state is then toggled: three Green pulses confirm USB data ON; three Red pulses confirm OFF. Wait for the pulses to finish before unplugging. Do not repeat after Red confirmation unless you intend to turn USB data back on.
To return to Web Configurator or firmware updates, disconnect the keyboard's USB cable and repeat the MODE startup gesture on a separate supply if USB data is OFF. Three Green pulses confirm ON. Then connect to the computer using a USB data cable. Factory reset also enables USB data, but it replaces your saved settings and is not needed just to restore USB.
Change the primary MIDI profile without a computer
Factory settings use CC7 Channel Volume. P1 Green, P2 Amber and P3 Red each have one active layer, output 0-127, on MIDI channels 1, 2 and 3; Layers 2 and 3 are off. To select CC11 Expression from this setup, disconnect power, hold only the encoder's push switch while reconnecting USB, wait until steady Amber goes out after about 2 seconds, then release. Three Amber pulses confirm CC11. Repeat the gesture to return to CC7, confirmed by three Green pulses.
The choice is based on P1 Green's Layer 1 CC, not on whichever preset was active. CC7 changes to CC11; any other CC changes to CC7. If P1 has a custom CC, confirm CC7 first before deliberately repeating the gesture for CC11. This does not change the USB-data state.
Back up custom settings first: this shortcut rebuilds the layer settings of all three presets, including routing, channels, input/output ranges, curves and Attack/Release. Calibration and Gain remain. To change only a CC while keeping custom layer settings, use Web Configurator instead.
The button, pulse count and color belong together
Both single-button startup shortcuts require release before the three confirmation pulses. Releasing too early or pressing the other button during the hold cancels the shortcut with two Amber pulses. Holding both buttons together from power-on instead requests factory reset: an approximately 5-second accelerating Red countdown, Amber while writing, then Green completion. Never disconnect power during the Amber write stage.
The normal startup fade and later Gain/VU colors do not confirm a USB or CC change. After a normal power-up the encoder adjusts Gain. Click once before turning to select a preset; click again to return. Preset Select repeats a soft fade in the selected preset color. Gain uses steady colors at rest; OUT MIN uses a repeating pair of soft Amber fades. Short-press MODE to choose Gain or OUT MIN; hold MODE about 1 second to lock or unlock the panel.
Verify the receiving sound before the performance
At a low listening level, hold a note and apply breath. CC7 sets channel volume; CC11 provides expression relative to that level. The selected sound and MIDI filters must accept the chosen CC and channels. The startup shortcut cannot create a missing mapping in the keyboard. Keep one MIDI path during the first test to avoid duplicate data.
For calibration with the device already running, leave the mouthpiece idle and hold the encoder about 2 seconds. Release when calibration starts. Pulsing Red gives about 9 seconds to begin a controlled, repeatable maximum comfortable breath. Keep it steady while Green is on; two fast Green pulses confirm the saved calibration. This running-device operation is different from holding the encoder while connecting USB.